LED Downlights and Recessed Spots: Cut-Out Size, Lumens, Spacing and IP Rating
How to choose LED downlights and recessed spots: cut-out size and installation depth, lumens per room, spacing between downlights and to the wall, IP rating for bathrooms, dimming, glare and the most common mistakes.
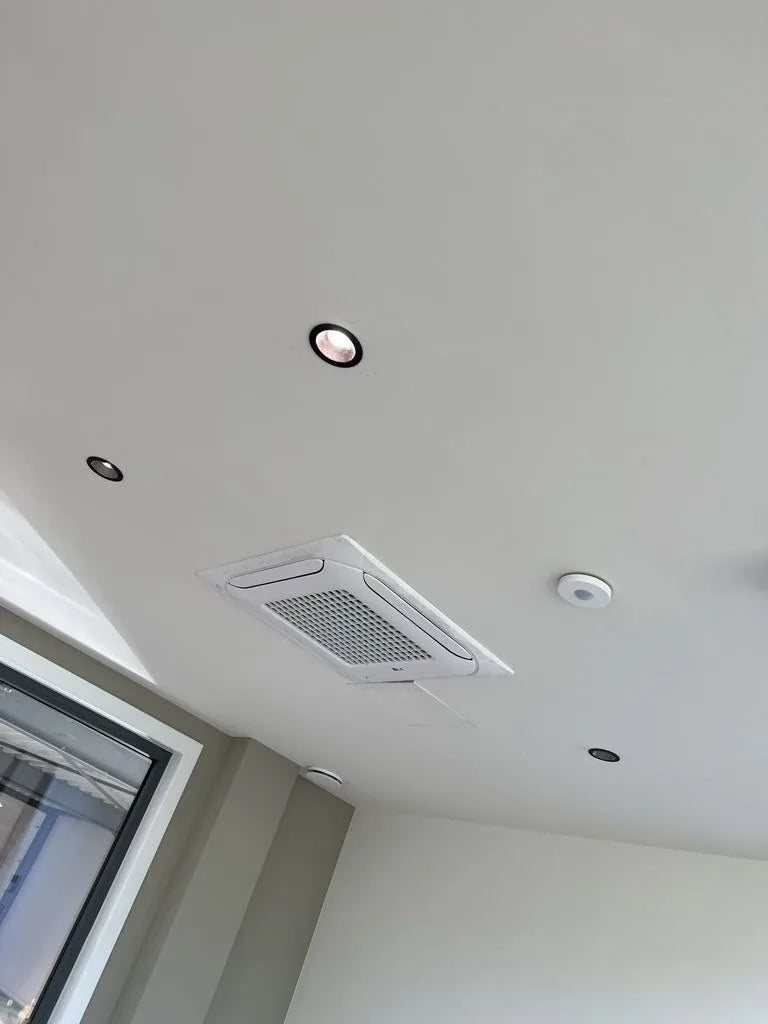
Downlights look simple: a hole in the ceiling and a light in it. In practice four choices decide whether the result works: the cut-out size, the light output, the spacing and the protection rating. Get one wrong and you end up with holes that are too large, dark patches between the spots, glare or a bathroom light that is not allowed above the shower. This guide covers all four, plus dimming, glare and installation in insulated ceilings.
- Cut-out size is the diameter of the hole in the ceiling, not the outer diameter of the trim. Check it on the data sheet before drilling, and measure existing holes when replacing old spots.
- Installation depth matters as much as the hole: slim LED downlights need only a few centimetres, deeper reflector downlights more. Leave room for the driver.
- Light output: roughly 100–150 lm per m² for hallways and living areas, 300–500 lm per m² for kitchens, offices and work areas.
- Spacing: at a ceiling height of 2.5–2.7 m, about 1.2–1.8 m between downlights, and about half that distance to the wall.
- Bathrooms: above the shower or bath at least IP44, IP65 recommended. In insulated ceilings, only use downlights approved for covering with insulation.

Downlight, recessed spot or surface-mounted light?
| Type | Characteristics | Typical use |
|---|---|---|
| Slim LED downlight (flat, opal diffuser) | Very shallow, wide soft light, simple installation | Hallways, living areas, offices, renovations with little ceiling void |
| Reflector downlight (deep housing) | Light source set back in a reflector, less glare, more directed light | Shops, hotels, kitchens, rooms with screen work |
| Recessed spot (small, often tiltable) | Narrow beam, accent lighting | Highlighting walls, artwork, displays and counters |
| Surface-mounted downlight | No hole needed, mounted directly on the ceiling | Concrete ceilings, ceilings without a void, quick replacement |
For larger areas with a grid ceiling, LED panels are often more efficient than many small downlights; see LED panel 60×60 or 62×62.
Cut-out size and installation depth
The cut-out size is the diameter (or, for square models, the side length) of the hole in the ceiling. It is always smaller than the visible trim, which covers the edge of the hole. Manufacturers often give a range, for example Ø94–104 mm, because the spring clips hold the downlight in holes within that range.
| Cut-out | Typical power | Typical use |
|---|---|---|
| Ø70–80 mm | 3–6 W | Accent and orientation light, replacing old GU10 spots |
| Ø95–110 mm | 6–12 W | Hallways, bathrooms, living areas |
| Ø145–160 mm | 12–18 W | Kitchens, offices, shops |
| Ø190–215 mm | 18–24 W | Larger rooms, high ceilings, commercial areas |
Three practical points:
- Replacing old spots: measure the existing hole, not the old trim. A new downlight with a slightly larger trim can cover an old hole; a hole that is too large cannot be fixed without filling and repainting.
- Installation depth: check the space above the ceiling. Slim LED downlights need about 25–45 mm, deeper reflector downlights 60–120 mm. Joists, pipes and ventilation ducts limit where holes can go.
- Ceiling thickness: spring clips hold best in plasterboard and suspended ceiling panels of normal thickness. For very thin or very thick ceilings, check the clamping range in the data sheet.

How many lumens per room?
Wattage says little about brightness; what counts is the luminous flux in lumens. As a guideline for downlights at normal ceiling heights:
| Room | Lumens per m² (guideline) | Example: 12 m² |
|---|---|---|
| Hallway, stairs, storage | 100–150 lm | 1,200–1,800 lm, e.g. 3 × 6 W |
| Living room, bedroom | 100–200 lm, preferably dimmable | 1,200–2,400 lm |
| Bathroom | 200–300 lm | 2,400–3,600 lm |
| Kitchen, worktops | 300–500 lm | 3,600–6,000 lm, plus task lighting |
| Office, shop | 400–600 lm | 4,800–7,200 lm |
These values already account for typical losses. For working areas the required illuminance is laid down in EN 12464-1; see how much lux do you need and, for offices, office lighting. A modern 6 W LED downlight with about 480 lm replaces an old 35–50 W halogen spot.
Spacing between downlights
Even light needs evenly spaced downlights. As a starting point for ceilings of 2.5–2.7 m:
- Between downlights: about 1.2–1.8 m. Small spots with a narrow beam need less spacing; wide-beam downlights can be further apart.
- To the wall: about half the spacing between downlights, typically 0.5–0.8 m. Wall-washing accent spots go closer, about 0.3–0.5 m from the wall.
- Higher ceilings: use more powerful downlights with a narrower beam, or increase the spacing in proportion to the height.
- Layout: align downlights with furniture, worktops and walkways, not just in a grid. Avoid placing a spot directly above a seat or bed, where it shines straight into the eyes.
The beam angle determines how far apart downlights can be; see LED beam angle explained.
IP rating: bathrooms, kitchens and outdoor canopies
| Location | Recommended protection |
|---|---|
| Living areas, hallways, offices | IP20 is sufficient |
| Bathroom, outside the shower and bath zones | IP20–IP44, depending on national rules |
| Bathroom, above the shower or bath (zone 1) | At least IP44 (IPX4), IP65 recommended |
| Kitchen above the cooker, canopies, carports | IP44–IP65 |
Bathroom zones and their requirements are set out in the installation standard for bathrooms (IEC 60364-7-701 and national versions), and some countries add their own rules. The installer is responsible for following them. More on protection ratings in IP ratings explained.
Dimming, colour temperature and glare
- Dimming: only dimmable downlights with a matching dimmer give stable, flicker-free light. Check whether the driver is designed for phase-cut (TRIAC) dimming or for 1-10V or DALI control, and observe the minimum and maximum load of the dimmer. See 0-10V, 1-10V and TRIAC dimming.
- Colour temperature: 2700–3000K for living areas and hospitality, 4000K for offices, kitchens and shops, 5000–6000K for workshops and technical rooms. Never mix colour temperatures in one room. See colour temperature.
- Glare: flat downlights with an opal diffuser are bright across their whole surface. In offices and rooms with screen work, reflector downlights with a set-back light source or models with UGR<19 are more comfortable. See UGR glare limitation.
Installation: insulation, drivers and connection
LED downlights produce little heat compared with halogen, but the driver and LEDs still need cooling. In ceilings with insulation, only use downlights that are explicitly approved for covering with insulation; otherwise keep the insulation away from the housing. In multi-storey buildings, fire-resistant ceilings may need fire-rated downlights or covers. Place the external driver so that it remains accessible for maintenance and does not rest on insulation. The 230V connection must be made by a qualified electrician; see connecting an LED light fitting.
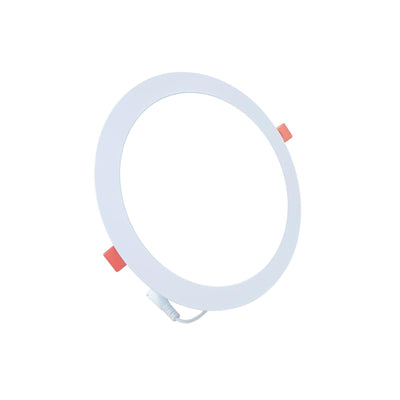
LED downlights and recessed spots from Clightstore – round and square, recessed and surface-mounted, 3W to 24W:


Common mistakes
- Drilling based on the outer diameter instead of the cut-out size. The hole ends up too large.
- Choosing by wattage instead of lumens. Two 12 W downlights can differ greatly in light output.
- Too few, too powerful downlights, giving bright spots and dark corners, or too many, giving a “Swiss cheese” ceiling.
- Non-dimmable downlights on a dimmer, or a dimmer that does not match the driver, causing flicker and humming.
- IP20 downlights above the shower or downlights buried in insulation without approval.
Frequently asked questions
What is the cut-out size of a downlight?
It is the diameter of the hole you drill in the ceiling. It is always smaller than the outer diameter of the visible trim. The data sheet usually gives a range, such as Ø94–104 mm, within which the spring clips hold the downlight securely.
How far apart should downlights be?
At a ceiling height of 2.5–2.7 m, about 1.2–1.8 m between downlights and about half that distance to the wall. Narrow-beam spots need less spacing, wide-beam downlights more. A light calculation gives certainty for offices and shops.
How many downlights do I need for a room?
Multiply the floor area by the lumens per m² for the room type and divide by the lumens per downlight. A 12 m² hallway at 150 lm/m² needs about 1,800 lm, for example four downlights of about 480 lm each.
Can I use LED downlights in the bathroom?
Yes, as long as the protection rating suits the zone. Above the shower or bath use at least IP44, preferably IP65. Outside the wet zones a lower rating is often allowed, depending on national rules.
Can I replace halogen spots with LED downlights?
Yes. Measure the existing hole: if the new downlight has the same or a slightly larger cut-out range, it fits. A 6 W LED downlight replaces a 35–50 W halogen spot. Halogen transformers must be removed; LED downlights come with their own driver.
What if my ceiling has no space for recessed downlights?
Use surface-mounted downlights. They are mounted directly on the ceiling and need no hole, which makes them suitable for concrete ceilings and renovations.
Send us the floor plan, ceiling height and ceiling type. We advise on the right downlights, cut-out sizes and layout and prepare a free DIALux light plan. EU-wide delivery in 2–5 working days, up to 5 years’ warranty.
Request advice and a quote